


How to Change Dirt Bike Tires Step by Step
Last Updated: November 20, 2026
Quick Summary
To change dirt bike tires, loosen the axle nut on the ground, lift the bike, remove the wheel, deflate the tire and pull the valve core, break the bead on both sides, then pry one bead over the rim with tire irons and rim protectors to swap the tube. Add a little air to the new tube and use short, shallow pries to avoid pinching it.
- Loosen the axle nut while the bike is still on the ground so the wheel does not spin.
- Pull the valve core so the tire fully deflates and the bead drops into the rim drop center.
- Start prying opposite the rim lock and push the opposite bead into the drop center.
- A first-time tire change at home can take 45-60 minutes.
- A tube must match the tire size stamped on the sidewall, including rim diameter.
Ready to change your own tires?NE Cycle Shop stocks tire tools, tubes, and gear for dirt bikes and ATVs, shipped fast.
Shop Tire Tools
Table of Contents
- Dirt Bike Tire Changing Tools You Need Before You Start
- Step-by-Step: Removing the Wheel, Breaking the Bead, and Swapping the Tube
- How to Change a Dirt Bike Tire Without Pinching the Tube
- How to Change a Dirt Bike Tire on the Trail
- How Long Does It Take to Change a Dirt Bike Tire?
- Tire and Tube Compatibility, Torque Specs, and Post-Install Checks
- Frequently Asked Questions
Dirt Bike Tire Changing Tools You Need Before You Start
Changing dirt bike tires starts with having the right tools laid out before you touch the bike. A tire change goes sideways fast when a rider is missing a bead breaker or a spare tube.
A solid home setup covers the basics without breaking the bank:
- Bead breaker or a tire change stand with one built in
- Two or three tire irons with smooth, rounded tips
- Rim protectors to guard against scratches
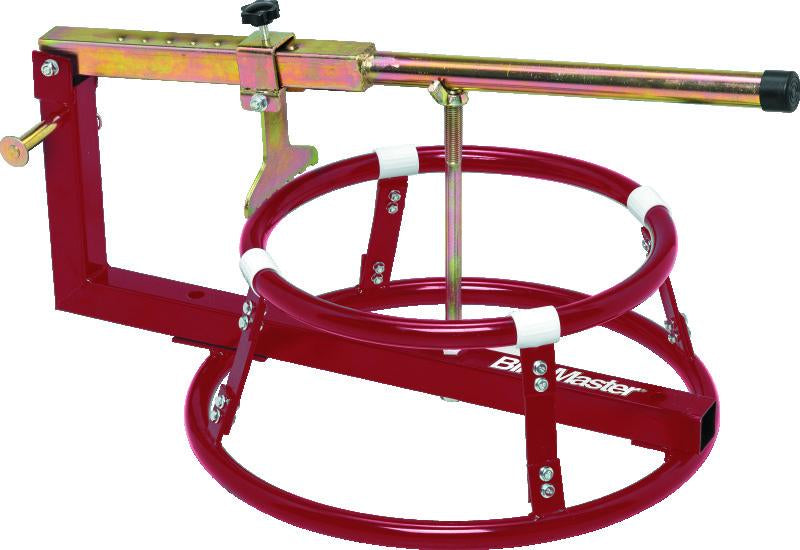
For a full garage station, the BikeMaster Tire Change Stand with Bead Breaker includes an adjustable bead breaker with an extra-long handle for stubborn beads.
The Core Tool Kit for Home and Trail
Home and trail kits serve different jobs. At home you can carry bulky tools. On the trail, every ounce counts.
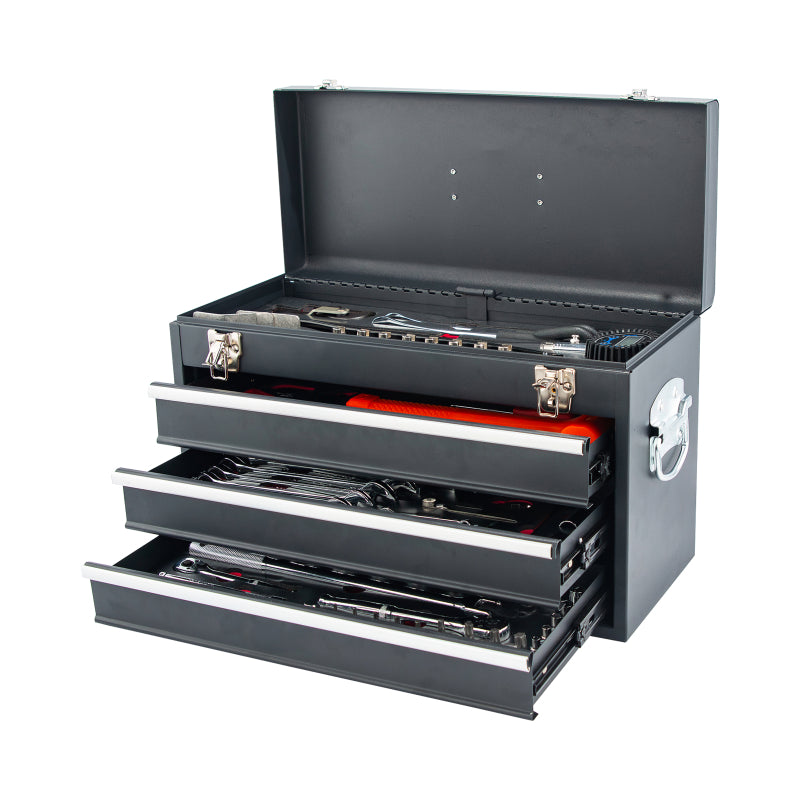
A garage kit should include a breaker bar, a full metric socket set, and a dedicated bead breaker. The BikeMaster 3-Drawer Toolbox with 129-Piece Tool Set includes 3/8" hex axle tools, tire spoons, a motorcycle bead tool, and a valve core tool in one case.
For trail riding, pack light. The CruzTOOLS SPEEDKIT packs metric combination wrenches, a 4-in-1 screwdriver, Torx bits, hex keys, locking pliers, and a low-range 0-20 PSI tire gauge into a durable zippered pouch.
Step-by-Step: Removing the Wheel, Breaking the Bead, and Swapping the Tube
Here's the full sequence for changing dirt bike tires from start to finish. Follow the order below and the job stays manageable. The steps assume a tube-type wheel; mousse and tubeless setups differ and are covered further down.
- Loosen the axle nut while the bike is still on the ground. The wheel is held by the bike's weight, so the nut breaks free without the wheel spinning.
- Lift the bike on a stand so the wheel spins free and the axle can slide out without binding.
- Remove the axle and spacers, then slide the wheel out. Keep the spacers and axle in a tray so they don't roll away.
- Deflate the tire and pull the valve core with a valve core tool. A fully deflated tire is the only way the bead will drop into the rim drop center.
- Loosen the rim lock nut a few turns, but leave it on the stud. The rim lock should retract enough to clear the bead without the nut coming off.
- Break the bead on both sides with a bead breaker. Work around the rim rather than at one spot; the bead releases progressively.
- Pry one bead over the rim using tire irons and rim protectors. Start opposite the rim lock and push the opposite bead into the drop center as you go.
- Pull out the old tube, then the tire. Note the tube's orientation and valve-stem position so the new tube goes in the same way.
- Inspect the rim and tire before installing anything new. Run a finger inside the tire for thorns, glass, or a folded liner, and check the rim strip for tears.
- Fit the new tube, seat the second bead, and inflate. Add a little air to the tube first so it holds shape and resists pinching.
Front vs. Rear Wheel: What Changes
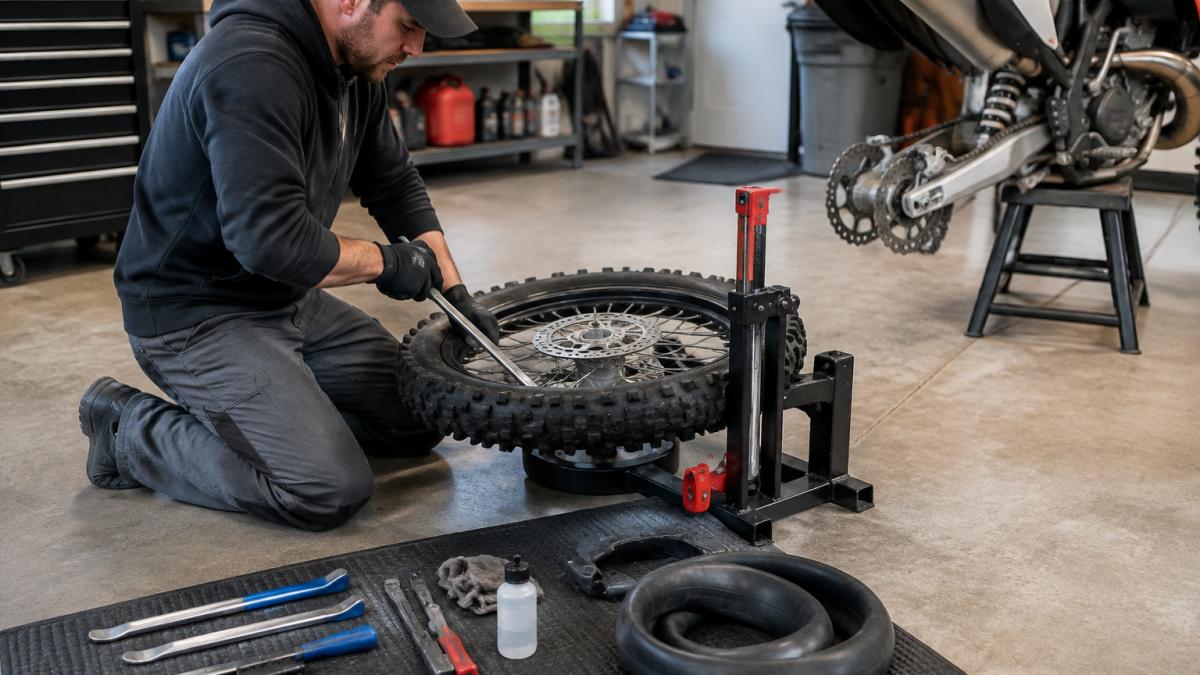
Rear wheels carry the sprocket and usually a rim lock. Front wheels are lighter and simpler, but the axle setup differs.
Rim-lock placement also differs. Rear wheels commonly run one rim lock opposite the valve stem; some front wheels run none, and a few run two.
Watch out: reinstalling the rear wheel with the sprocket on the wrong side or a spacer swapped left-to-right will misalign the chain and rotor, so lay the parts out in removal order and reverse it.
How to Change a Dirt Bike Tire Without Pinching the Tube
Pinch flats are the most common mistake in dirt bike tire changes. The tube gets trapped between the tire iron and the rim, and it fails the moment you inflate.
Here's how we avoid it:
- Add a little air to the new tube so it holds shape.
- Push the opposite bead into the rim drop center as you work the iron.
- Use short, shallow pries instead of long scoops.
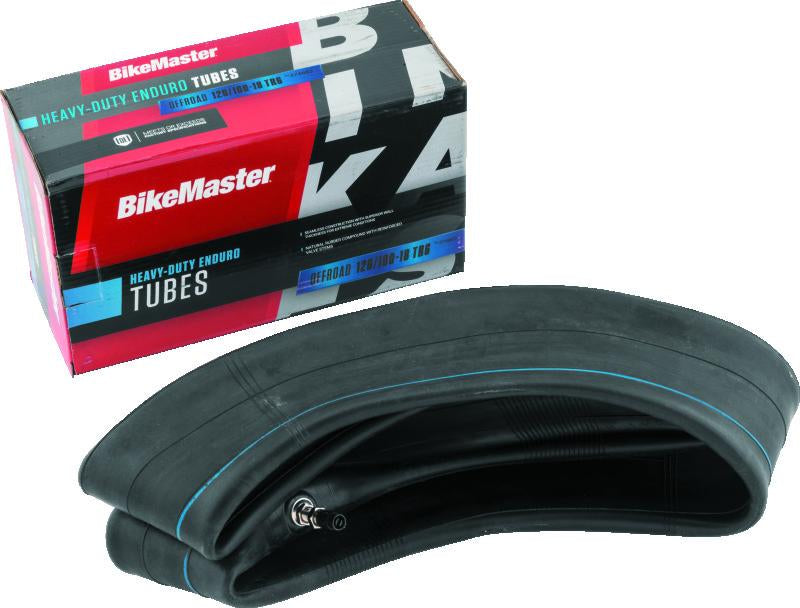
A heavy-duty tube helps too. The BikeMaster 120/100-18 TR6 Tube Extra Heavy Duty uses a natural rubber compound with reinforced valve stems and increased wall thickness, and is designed to help reduce the risk of punctures and pinch flats off-road.
Watch out: rushing the last few inches of the second bead is where most tubes get pinched. Slow down there.
How to Change a Dirt Bike Tire on the Trail
Trailside tire changes demand a pared-down approach. Without a stand, you will need to work with the bike itself.
Consider packing these items in your riding bag:
- Two compact tire irons
- A spare tube in the right size
- A mini pump or CO2 inflator
Work the bead off one side only, swap the tube, and reseat. Skip the full tire removal unless the tire itself is damaged.
How Long Does It Take to Change a Dirt Bike Tire?
A first-time tire change can take a rider well over half an hour. Times vary with practice, setup, and conditions.
The biggest time sinks are a stubborn bead and a pinched tube. A proper bead breaker and good lubricant cut both. Riders who change tires a few times a year get faster with each pass.
| Setup | Time Estimate | Key Factor |
|---|---|---|
| First attempt, home | 45-60 minutes | Learning the bead technique |
| Practiced, home garage | 20-30 minutes | Right tools on hand |
| Trailside change | 30-45 minutes | Weather and terrain |
| With a tire stand and breaker | 15-25 minutes | Use and stability |
Time Estimate
First attempt, home 45-60 minutes
Practiced, home garage 20-30 minutes
Trailside change 30-45 minutes
With a tire stand and breaker 15-25 minutes
Tire and Tube Compatibility, Torque Specs, and Post-Install Checks
Compatibility matters more than most riders realize. A tube must match the tire size stamped on the sidewall. A 120/100-18 tire needs a 120/100-18 tube, not a 110/90-18. Check the tire sidewall, the tube box, and the rim width before you start, because a tube that is too small stretches thin and a tube that is too large folds and pinches.
Verify these before you mount anything:
- Tire size vs. tube size match the sidewall numbers, including the rim diameter (the last number, such as 18 or 21).
- Rim width falls within the tire manufacturer's recommended range; a wide tire on a narrow rim will not seat evenly.
- Tube type matches the valve stem hole in the rim (TR6 or similar) and the riding conditions.
Diagnosing Common Failures Before You Ride
Most post-install problems show up in the first few minutes if you know what to look for. A tube trapped under the bead will usually leak or bulge at one spot; deflate, push the bead back into the drop center, and reseat. An uneven bead shows as a wobble or a visible line that sits high in one area; deflate, lubricate, and re-inflate in small steps until the line is even all the way around.
Torque and Post-Installation Checks
Always confirm torque values in your owner's manual; they vary by model and fastener. Guessing on axle torque can damage bearings or leave a wheel loose. As a checklist, verify the axle nut, the rim-lock nut, the brake caliper bolts, and the chain adjusters against the manual, then spin the wheel and check for wobble. If you need a dual-sport rear tire option for dirt-oriented riding, browse the Avon Trekrider AV85 rear tire to check fitment for your wheel.
Mousse and Tubeless Setups
Mousse inserts and tubeless systems change the tools and the sequence, and the methods are not interchangeable with a standard tube-type change.
Watch out: inflating a tube-type tire with a pinched tube can split the tube suddenly, so inflate in small steps and stop at the first sign of a bulge or leak.
Changing dirt bike tires rewards preparation more than strength.
Frequently Asked Questions
What tools do you need to change a dirt bike tire?
At minimum you need two or three tire irons, a bead breaker, rim protectors, bead lubricant, a valve core tool, and a pump or CO2 inflator. A dedicated tire change stand with a bead breaker makes the job easier, and a compact trail kit covers wrenches, a low-pressure gauge, and spoons for roadside repairs. Keep a spare tube sized to your tire and check that your irons are smooth so they do not scratch the rim.
How do you change a dirt bike tire without pinching the tube?
Push the opposite bead deep into the rim's drop center so the tire has slack, then work your irons in small bites. Coat the new tube lightly with talc or soapy water, seat the valve stem first, and inflate just enough to hold shape before levering the second bead on. Stop if an iron feels like it is biting rubber rather than sliding under the bead, and use rim protectors to keep the tube clear of metal edges.
How long does it take to change a dirt bike tire?
A first-timer working in a garage should allow extra time for setup and cleanup. With practice, a rear tire change takes less time. Trailside changes run longer because you are working on the ground with limited tools, so budget an hour and carry a compact kit so you are not improvising.
Can you change a dirt bike tire without tire spoons?
It is possible with a bead breaker and careful hand work on some soft tires, but spoons are the practical tool for the job. They give you leverage to lift the bead over the rim without damaging the tube or rim. Carry at least two, ideally three, and choose curved irons with smooth edges. A bead tool and rim protectors make the process more controlled, especially on stiff off-road tires.
